How to Retouch Skin Blemishes in Photos
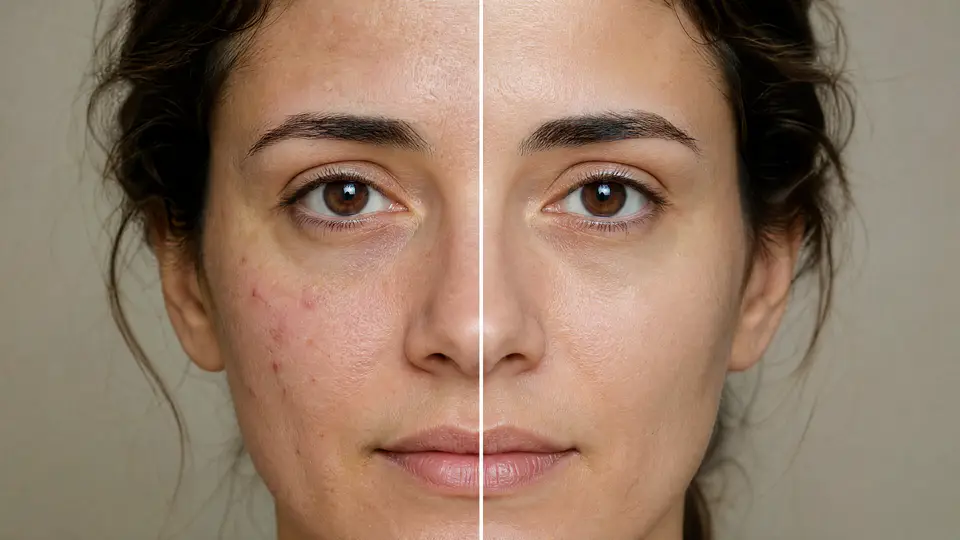
Small skin details such as pimples, temporary redness, under-eye shadows, or fine lines can stand out more in a photo than they did in real life. A light retouch can help a portrait look cleaner while still keeping the person recognizable and natural.
For quick portrait cleanup, use the Imgkits blemish remover. For more precise manual selections, use Imgkits inpaint. Keep edits honest, especially for IDs, official documents, medical images, job applications, or any situation where appearance should not be misrepresented.
What Counts as a Good Skin Retouch?
A good retouch reduces temporary distractions without changing who the person is. Removing a pimple, small spot, dust mark, or harsh shadow is different from reshaping facial features or making someone look unreal. Aim for a clean but believable result.
Step 1 Choose the Right Retouching Tool
Use blemish remover when the edit is a common portrait issue such as a pimple, spot, small wrinkle, or skin mark. Use inpaint when you want to manually select a specific area or repair a small background issue near the face.
Step 2 Select Only the Area You Want to Improve
Keep the selection tight. Do not cover the whole face when the problem is only one small mark. Smaller selections preserve skin texture, hair edges, freckles, eyelashes, and other details that make a portrait look natural.
Step 3 Preview the Result Before Saving
After running the retouch, zoom in and compare the repaired area with the rest of the skin. If the area looks blurred or too smooth, undo the edit and use a smaller selection. Natural skin should still have texture.
Which Skin Issues Can You Retouch?
| Photo Issue | Recommended Approach | Retouching Tip |
|---|---|---|
| Pimple or small spot | Blemish remover | Select only the spot and keep nearby skin texture visible. |
| Fine wrinkle or crease | Blemish remover or inpaint | Soften the line instead of removing all facial texture. |
| Redness or temporary mark | Blemish remover | Use a light pass and compare with surrounding skin tone. |
| Dust, scratch, or background mark near the face | Inpaint | Repair the mark without selecting facial details. |
Tips for Natural Portrait Cleanup
- Keep pores, freckles, and normal skin texture where possible.
- Use small selections instead of one large face-wide selection.
- Retouch temporary marks more strongly than permanent features.
- Check the image at both full size and normal viewing size.
- Save a copy of the original image before editing.
When You Should Avoid Heavy Retouching
Avoid strong retouching when the photo is used for a passport, ID, legal document, medical context, or any professional review where accuracy matters. In those cases, keep the photo truthful and follow the required rules.
FAQ
Can I remove pimples from a portrait?
Yes, for personal photos or images you have permission to edit. Use a tight selection and check that the repaired area still looks like real skin.
Can I remove wrinkles completely?
You can soften distracting wrinkles, but removing all lines often makes a face look artificial. A subtle retouch usually looks better.
Which tool is best for skin blemishes?
Use blemish remover for common portrait retouching and inpaint for manual repair work on small selected areas.
Final Thoughts
The best portrait retouching is careful and restrained. Use blemish remover for small temporary skin details, inpaint for precise repairs, and keep the final photo natural enough that it still represents the person honestly.