Restoring Accurate Color in Old Photos
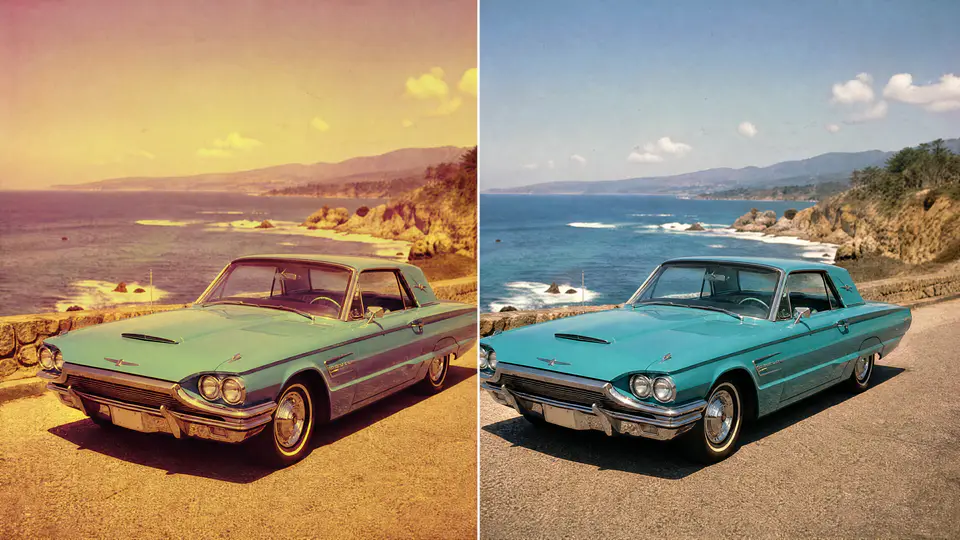
Color photos fade for a different reason than black-and-white photos. The dyes in old prints can break down over time, leaving the image with weak contrast, a magenta or blue cast, dull skin tones, and colors that no longer match …