How to Restore Sun-Faded Photos Online
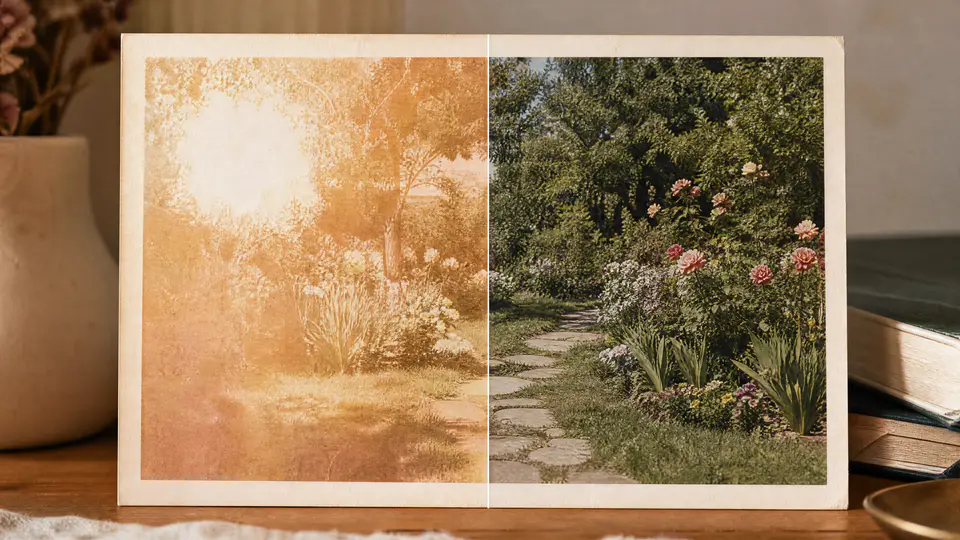
Sunlight can slowly drain the color and contrast from printed photos. A picture that once looked warm and clear may become pale, yellowed, uneven, or washed out after years near a window, in a frame, or in poor storage conditions.
If the photo still has enough visible detail, you can start with Imgkits photo restoration to recover the image online. After restoration, the AI photo enhancer can help improve clarity when the restored image still looks soft.
What Sun Fading Does to Photos
Sun fading is not just one problem. It can affect tone, color, contrast, and detail at the same time. The most exposed areas usually fade faster, which can create uneven patches or a halo-like difference between protected and exposed parts of the image.
- Weak contrast: dark areas become gray and highlights lose depth.
- Color shifts: photos may look yellow, red, blue, or magenta.
- Uneven fading: one side or one patch may look lighter than the rest.
- Soft detail: faces and background objects become harder to read.
How to Restore a Sun-Faded Photo Online
- Scan or photograph the original print in even lighting.
- Open the photo restoration tool.
- Upload the sun-faded photo.
- Let the tool restore color, contrast, and visible damage.
- Compare the restored version with the original.
- Use AI photo enhancer only if the final image needs more clarity.
What to Check After Restoration
Uneven Tone
Sun damage often affects one section more than another. Look for visible borders between faded and less faded areas, especially around windows, frames, or bright patches.
Discoloration
Review skin, sky, clothing, and neutral areas. If the image still has a strong color cast, the restoration may need another pass or a lighter enhancement.
Halo Effects
Some sun-faded photos show a line or halo where part of the print was protected. Check this area carefully before saving the final version.
Restoration vs Enhancement for Sun-Faded Photos
| Problem | Best First Step | Why |
|---|---|---|
| Faded color and contrast | Photo restoration | It targets age and damage recovery first. |
| Soft details after restoration | AI photo enhancer | It can improve clarity after the main repair. |
| Uneven faded patches | Restore, then review manually | Patchy fading needs careful judgment. |
| Severe missing detail | Restore a copy and compare | Some information may be permanently lost. |
How to Protect Restored Photos
- Keep prints away from direct sunlight.
- Store original photos in dry, stable conditions.
- Use UV-protective glass if a print must be displayed.
- Archive both the original scan and restored version.
- Print a copy for display instead of exposing the original.
FAQ
Can sun-faded photos be fully restored?
Many sun-faded photos can be improved, especially when detail is still visible. If the original color information is completely gone, restoration can help but may not perfectly recreate the original.
Should I enhance before restoring?
Usually no. Restore the faded photo first, then use enhancement if the repaired image still needs more clarity.
Is it safe to edit the original file?
Keep the original scan untouched. Always work on a copy so you can compare versions or retry the restoration later.
Final Thoughts
Sun-faded photos need careful recovery because color, contrast, and tone may all be damaged at once. Start with the cleanest scan you can, restore the photo first, enhance only when needed, and protect the restored result from future light damage.