How to Fill Missing Areas in Old Photos
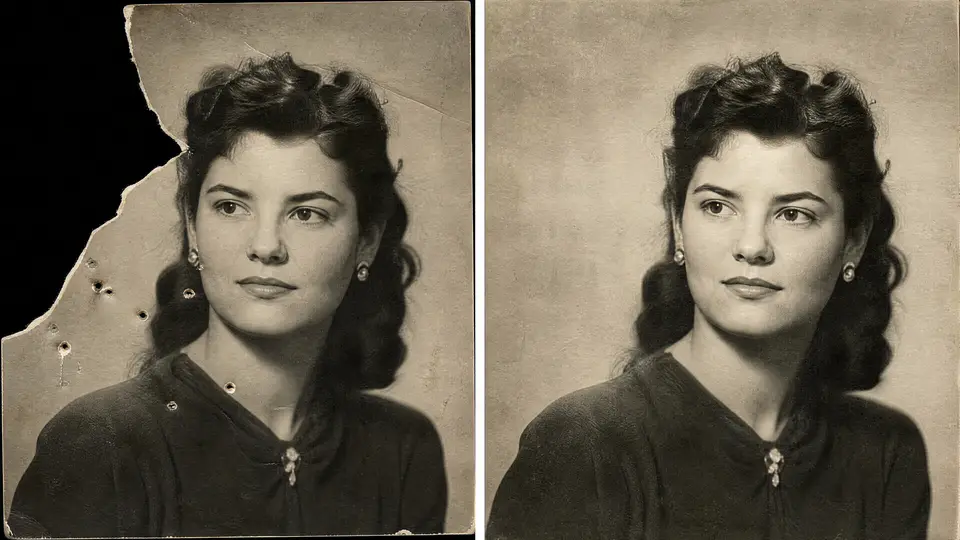
Some old photos are not only faded or scratched. They may have missing corners, torn areas, holes, deep creases, or blank patches where visual information is gone. These missing areas are harder than light scratches because the repair has to rebuild part of the scene in a believable way.
For many old family photos, you can start with Imgkits photo restoration to clean visible damage and improve the overall image. If the missing area behaves more like an object-removal or fill task, the inpaint tool can help fill selected areas using surrounding detail.
What Counts as a Void in an Old Photo?
A void is any area where the original image content is missing or unusable. It can be a torn corner, a white crack, a fold line, a water-damaged patch, or a blank area caused by a damaged print.
- Small voids: dust spots, tiny chips, and small cracks.
- Medium voids: creases, stains, and damaged clothing or background areas.
- Large voids: missing corners, torn faces, or important objects with lost detail.
How to Fill Missing Areas in Old Photos
- Scan or photograph the damaged photo as clearly as possible.
- Use photo restoration first if the whole image has scratches, fading, or general damage.
- Identify the missing or damaged area that still needs repair.
- Use inpaint-style cleanup for selected voids, especially when the surrounding texture can guide the fill.
- Review faces, hands, clothing, and important background details before saving.
- Keep the original scan and export a separate restored copy.
When Photo Restoration Works Best
Photo restoration is a good first step when the image has general age damage: faded color, scratches, spots, folds, and light missing detail. It helps improve the full photo before you focus on a specific missing area.
When Inpainting Helps More
Inpainting is useful when you need to fill one selected area based on nearby pixels. It works best for background textures, clothing, walls, grass, paper, or other repeated patterns. It needs more review when the missing area affects a face, hand, text, or historically important detail.
| Damage Type | Best First Step | Review Level |
|---|---|---|
| Light scratches and dust | Photo restoration | Low |
| Missing background corner | Inpaint after restoration | Medium |
| Torn clothing or repeated texture | Inpaint with nearby details | Medium |
| Missing face or important detail | Careful manual review after AI | High |
Tips for More Natural Repairs
- Work from a high-resolution scan whenever possible.
- Repair general damage before focusing on large missing areas.
- Use nearby texture as a guide for selected fills.
- Do not over-smooth old paper grain and natural photo texture.
- Compare the restored image against the original before sharing.
FAQ
Can AI fill a missing corner in an old photo?
AI can often fill missing background corners or repeated textures. If the missing area includes a face or important detail, review the result carefully and keep the original scan.
Should I crop the photo instead of filling the void?
Cropping can work when the missing area is near the edge and does not remove important people or context. If cropping would damage the composition, restoration and inpainting are better first steps.
What is the safest workflow for family photos?
Always keep the original file untouched. Restore or inpaint a copy, then compare the result with the original before printing or sharing it.
Final Thoughts
Filling voids in old photos is about rebuilding just enough detail to make the image whole again. Start with a clean scan, repair broad damage first, use inpainting for selected missing areas, and check the final result with a careful eye.