Twitter Account Cleaner

Introduction

Welcome to the world of Twitter, a buzzing hub where tweets fly at lightning speed, memes spread like wildfire, and hashtags link conversations from around the globe. If you’re an active user or manage a brand on this platform, you know the incredible engagement Twitter offers. But with great power comes the clutter of inactive followers, spammy accounts, and posts that no longer serve your digital image. That’s where Twitter account cleaners come into play, your new best friends in managing and optimizing your social media presence. Whether you’re a digital marketing pro seeking to refine a brand’s image or a casual tweeter looking to clean up your feed, these tools are designed to breathe fresh air into your Twitter experience. Join us as we explore the top Twitter account cleaner tools that will help you maintain a polished and effective social media presence.

Importance of Keeping Twitter Accounts Clean

Importance of Keeping Twitter Accounts Clean

In the bustling world of social media, Twitter stands out as a dynamic platform where news spreads like wildfire, and opinions and dialogues flow ceaselessly. It’s a potent tool for digital marketing, networking, and personal branding. However, with great power comes great responsibility. Your Twitter account can quickly become cluttered with inactive followers, irrelevant posts, and unwanted messages, potentially diluting your message and weakening your social media presence.

Maintaining a clean Twitter account is crucial for several reasons. Firstly, it enhances your profile’s appeal. A streamlined, focused account is more attractive to new followers who are interested in your content. Secondly, it boosts engagement. When you interact primarily with active, relevant users, your engagement rates can increase, as these users are more likely to interact with your content. Finally, cleaning up your Twitter account can significantly improve your mental health by reducing information overload and eliminating negativity, making your social media experience more enjoyable.

Top Twitter Account Cleaner Tools??

How To Delete All Retweets On Twitter Tutorial?

Tool 1: Features and Benefits

One standout tool is Tweet Delete. This powerful, user-friendly tool offers a range of features designed to streamline your Twitter experience. With Tweet Delete, you can bulk delete tweets and retweets, making it easier to remove old or irrelevant posts. It also allows you to automatically delete tweets after a certain period, ensuring your feed remains fresh and relevant. Additionally, Tweet Delete can help you easily find and remove tweets containing specific keywords or hashtags that no longer align with your brand or message. One of the most appealing aspects of Tweet Delete is its ability to archive deleted tweets, giving you the peace of mind that nothing is ever lost. The benefits of using Tweet Delete are manifold: a cleaner, more professional Twitter profile, improved engagement rates, and a more enjoyable social media experience.

Tool 2: Features and Benefits

Next on the list is Circleboom Twitter. This tool offers a comprehensive suite of features that make managing your Twitter account a breeze. Circleboom Twitter excels in identifying and removing fake, inactive, or spammy followers, helping you clean up your follower list and ensure that your audience consists only of genuine, interested users. It also provides detailed analytics, giving you invaluable insights into your Twitter activity and audience behavior, which can inform your content strategy. Another notable feature is the ability to schedule tweets, ensuring consistent engagement with your followers even when you’re busy. By using Circleboom Twitter, you can expect a more targeted and engaged follower base, enhanced brand credibility, and a significant reduction in the time spent managing your Twitter account.

Tool 3: Features and Benefits

Lastly, we have ManageFlitter. This tool is renowned for its no-nonsense approach to Twitter account management. ManageFlitter provides powerful features for unfollowing non-followers and inactive accounts, helping you maintain a healthy follower-following ratio. It also enables keyword and account search functionalities, making it easier to connect with like-minded individuals or brands. Its “PowerPost” feature allows you to schedule your tweets for optimal engagement times, ensuring your content reaches the maximum number of followers. The benefits of using ManageFlitter include a cleaner, more focused Twitter account, increased engagement, and the ability to grow your following organically by connecting with relevant users.

How Twitter Account Cleaners Benefit Digital Marketing Strategies

In today’s fast-paced digital landscape, Twitter stands out as a powerhouse for branding, networking, and customer engagement. However, managing a Twitter account effectively requires more than just tweeting at the right times. That’s where Twitter account cleaners come into play, serving as the unsung heroes of social media strategy. They offer benefits that are hard to ignore, especially for digital marketers looking to optimize their online presence.

Firstly, Twitter account cleaners help maintain a professional image. A cluttered Twitter account with irrelevant follows, outdated tweets, and a chaotic timeline can deter potential customers and partners. Cleaners can streamline your account, making it more appealing and easier to navigate. This polished presence not only attracts more followers but also boosts your brand’s credibility.

Secondly, these tools can significantly increase engagement rates. By removing inactive or non-interacting followers, your content reaches a more engaged audience. This means your tweets have a higher chance of being liked, retweeted, and replied to, driving more interaction and visibility for your brand.

Furthermore, Twitter account cleaners can save you a considerable amount of time and effort. Manually sifting through followers, identifying spam accounts, and staying on top of your Twitter hygiene could take hours out of your week. These tools automate much of the process, allowing you and your team to focus on strategy and content creation instead.

Lastly, they offer valuable insights into your follower base. Many Twitter cleaning tools provide analytics on your followers’ activity, preferences, and engagement levels. These insights enable more targeted and effective marketing strategies, as you better understand what resonates with your audience.

Tips for Maintaining a Clean Twitter Account

Tips for Maintaining a Clean Twitter Account

Maintaining a clean and effective Twitter account doesn’t have to be daunting. With a little bit of effort and the right tools, you can ensure your account remains an asset for your digital marketing strategies. Here are some practical tips to help you keep your Twitter account in tip-top shape.

Regularly Audit Your Following

Make it a routine to go through the accounts you’re following. Look out for inactive accounts or those that no longer align with your brand’s message. By curating who you follow, you create a more relevant and engaging feed for yourself and improve the quality of your own followers.

Utilize Twitter Account Cleaner Tools

Incorporate the use of cleaner tools into your Twitter strategy. These tools can help automate the process of identifying spam accounts, inactive followers, and non-follow backs. They make the task less cumbersome and keep your account streamlined.

Create High-Quality Content

Content is king, even on Twitter. Posting high-quality, engaging content is a natural cleaner. It attracts the right kind of followers and discourages spammy or inactive accounts from latching on. Ensure your tweets add value, whether through information, entertainment, or inspiration.

Engage With Your Audience

Don’t just broadcast; interact. Engage with your followers by responding to comments, retweeting relevant content, and being active in conversations. This not only helps in building a loyal community but also in maintaining an account that’s vibrant and appealing.

Keep an Eye On Your Account’s Health

Regularly check your Twitter analytics to gauge your account’s health. Look at metrics like engagement rate, follower growth, and the quality of interactions. This will help you identify areas for improvement and ensure your account cleaning efforts are paying off.

Schedule Periodic Cleanups

Set a schedule for regular cleanups. Whether it’s monthly or quarterly, having a fixed timeline ensures you’re consistently keeping your account tidy. This prevents buildup and makes the task more manageable.

By integrating these tips into your Twitter strategy, you can maintain a clean, engaging, and purposeful account. This not only enhances your digital marketing efforts but also fosters a stronger connection with your audience on this dynamic platform.

Conclusion

Cleaning up your Twitter account doesn’t just help in creating a more organized and appealing social media presence; it’s also integral to enhancing your digital footprint and marketing strategy. With the tools we’ve discussed, managing your followers, tweets, and overall account health becomes not just easier, but more efficient. Remember:

– Regularly audit your account to keep it fresh and relevant.

– Use the tools that best fit your specific needs, whether that’s for business or personal use.

– Engaging and retaining a quality audience on Twitter requires continuous effort.

By adopting a proactive approach to cleaning and maintaining your Twitter account, you’re setting the stage for more meaningful interactions, better engagement, and ultimately, success in your digital marketing endeavors. So, dive in, explore these tools, and take your Twitter game to the next level!

How to quickly turn a character in a photo into a 3D Disney cartoon image?

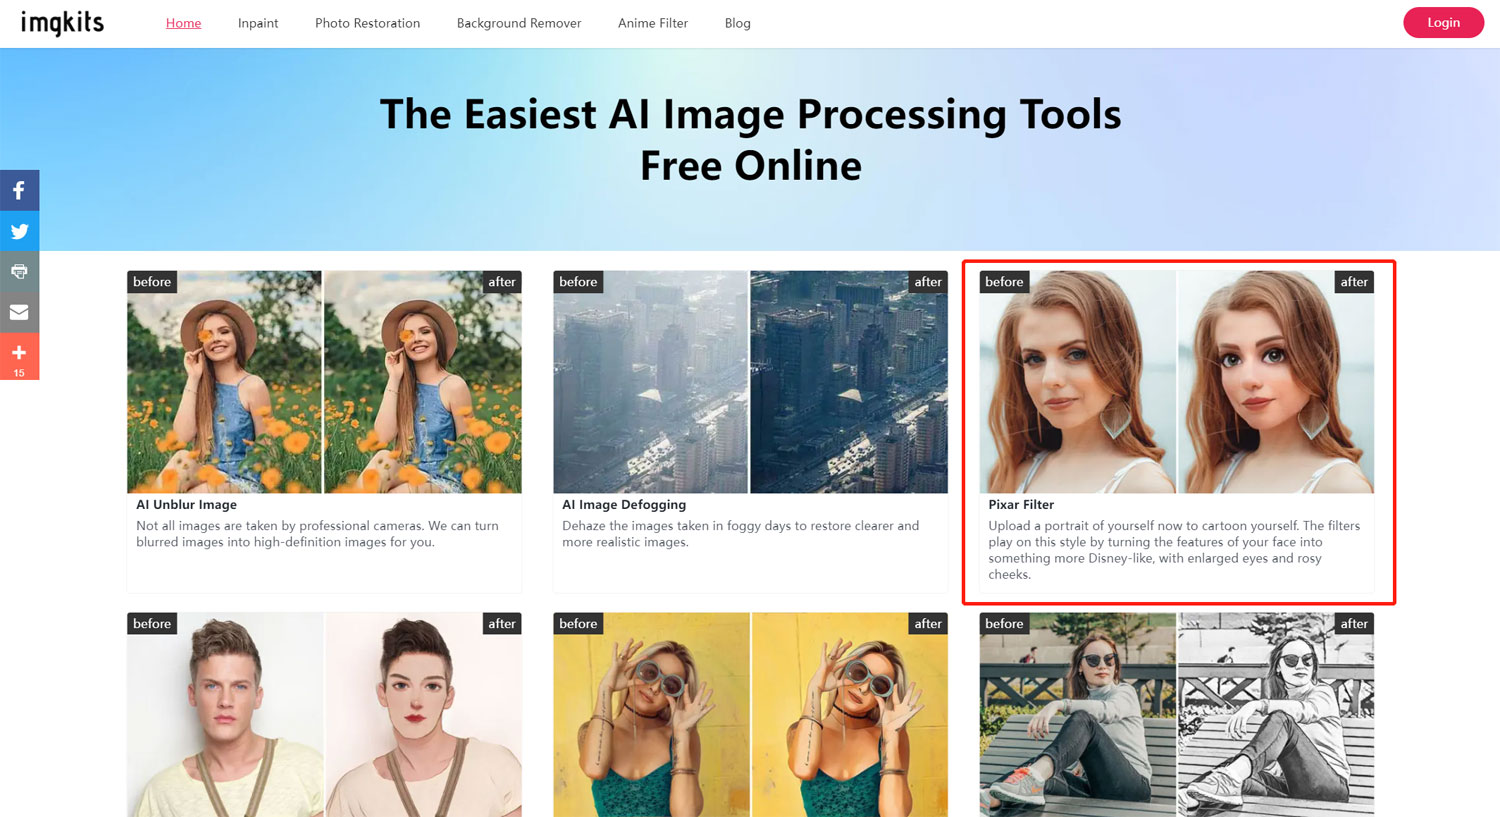
A character cartoon photo has recently become very popular on various social media outlets such as Instagram and Snapchat. This cartoon photo looks in the style of characters from Disney movies with large eyes and rose-colored cheeks, an effect known as the “Pixar filter” or “anime filter”.

How is this style of cartoon photo made? In fact, it is very simple, you do not need to have very professional image processing skills, just a simple photo upload can be obtained, the following I will take you to understand how to quickly and easily turn your portrait photos into this 3D Disney cartoon image photos it.

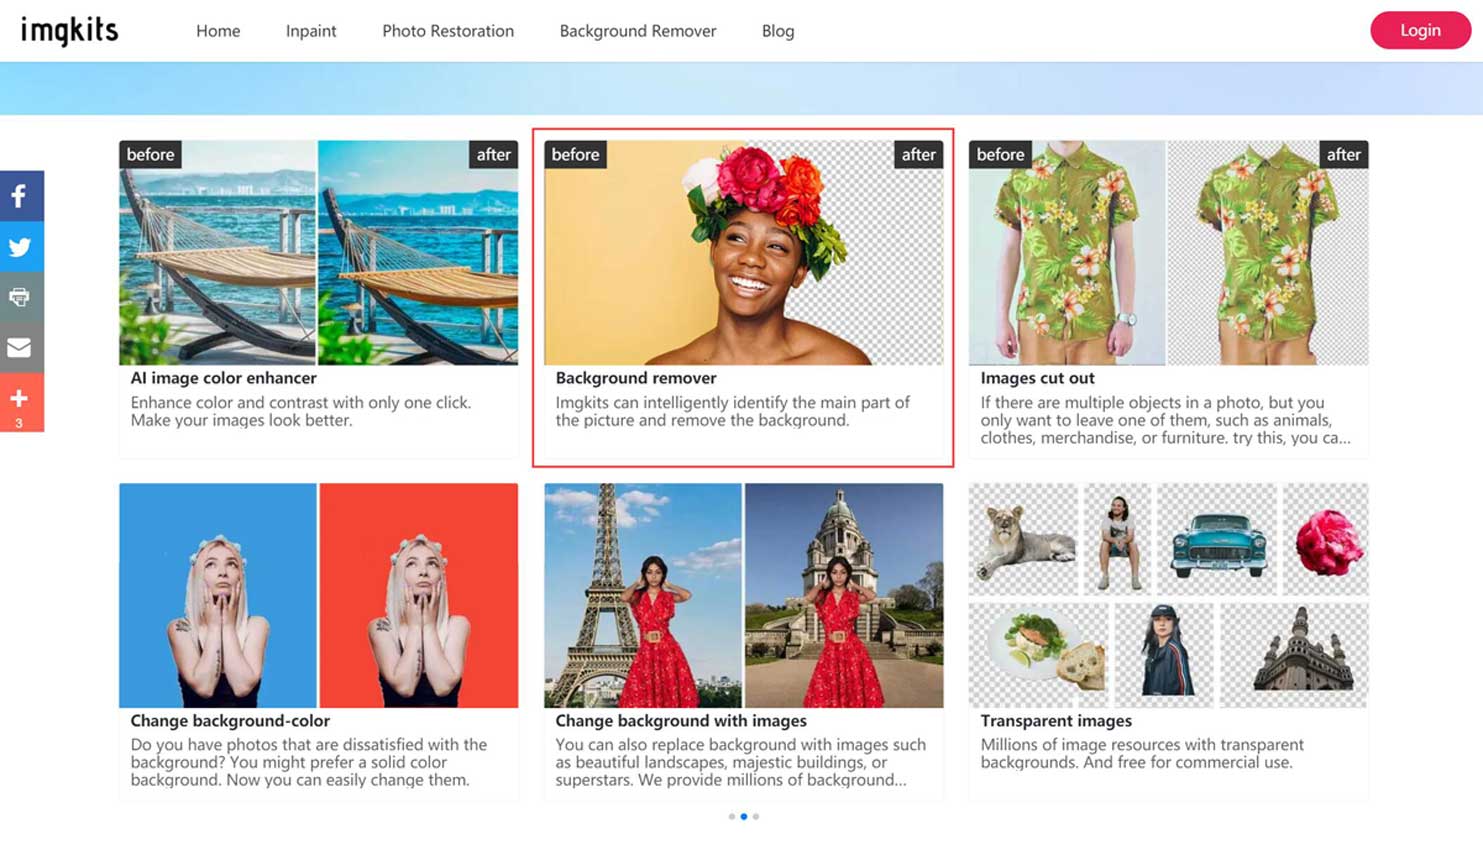
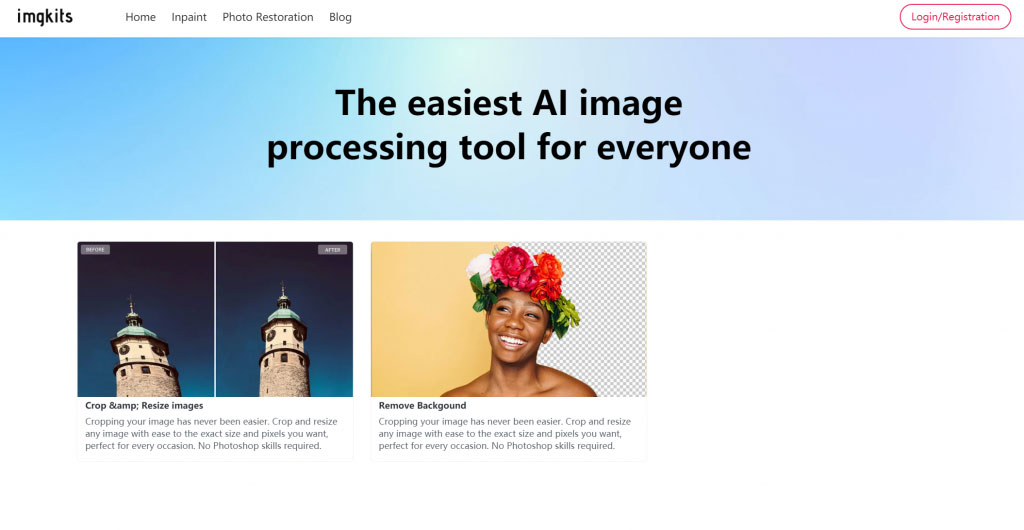
Step 1: Open into Imgkits, select “Pixar Filter” and click into it.

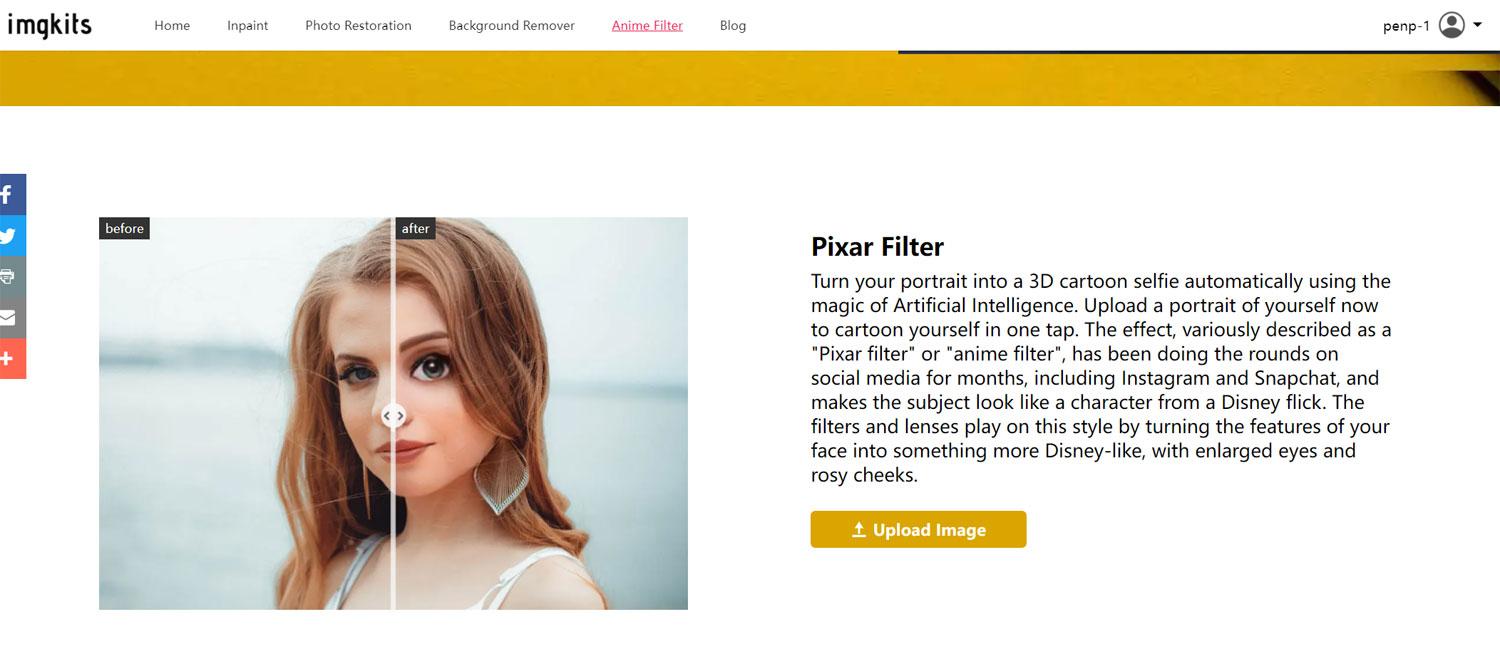
Step 2: Click “Upload Image” and upload the portrait photo of the person you want to turn into a cartoon image.

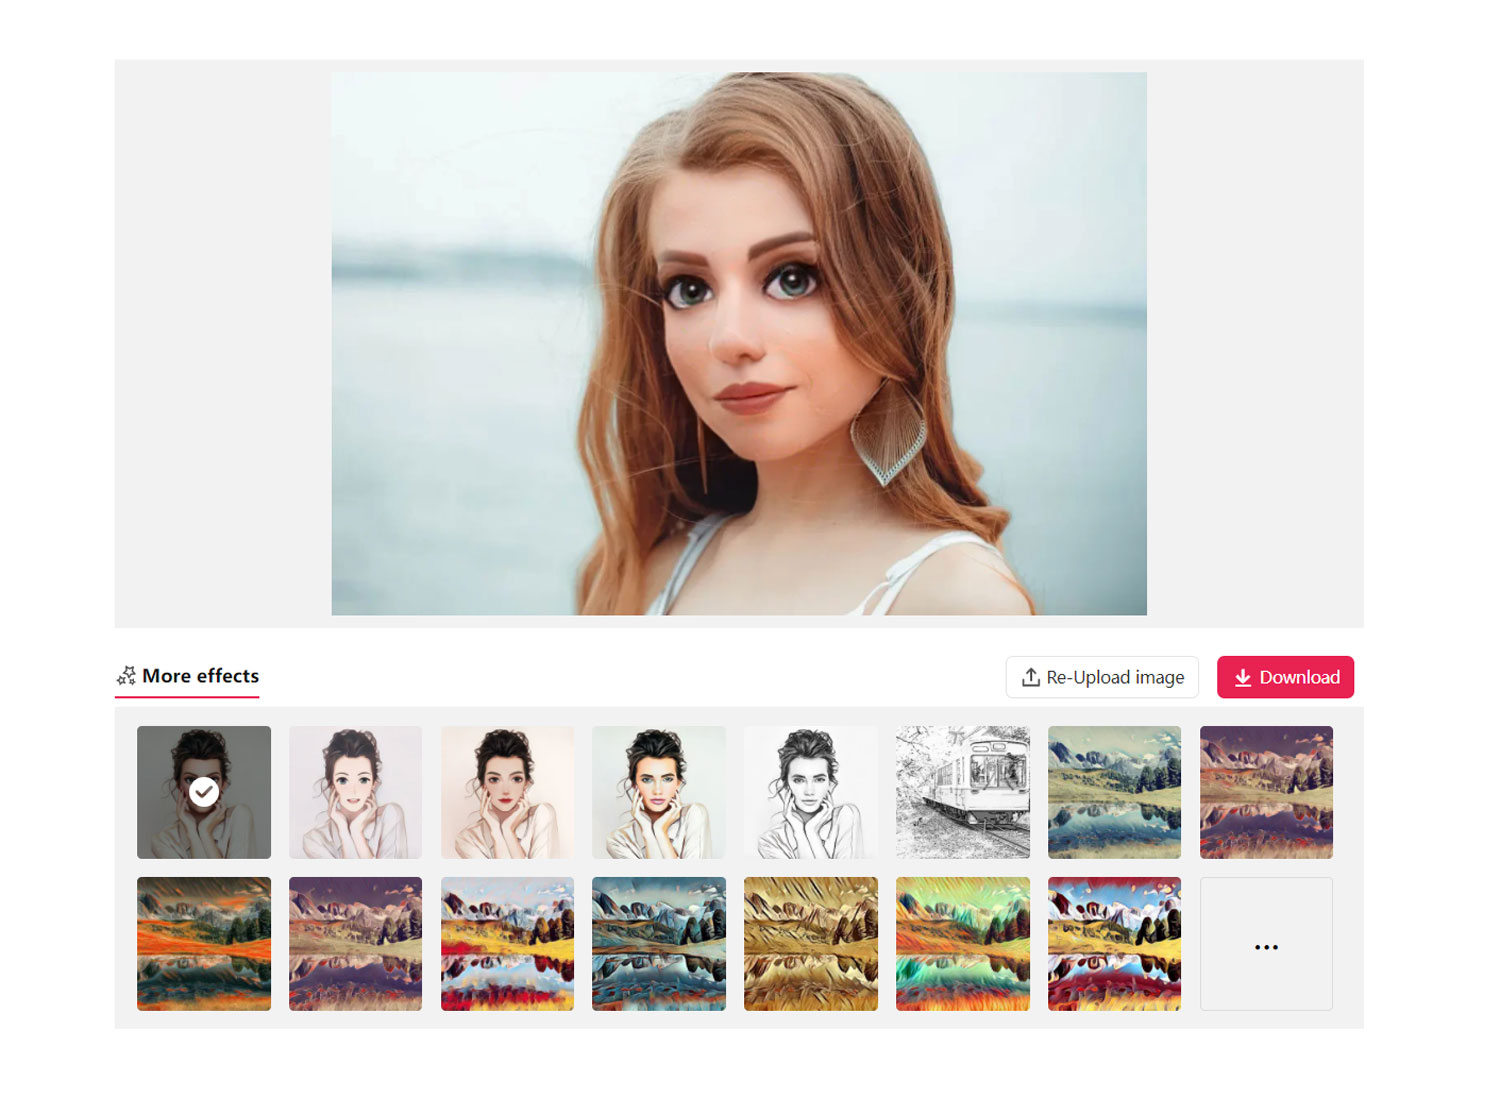
Step 3: Wait for 2 seconds, you will see the photo converted to 3D Disney cartoon image. Click the red “Download” button to save the generated 3D Disney cartoon photo to your desktop album; click the “Re-Upload image” button to re-upload the character photo.

Click on the small image under “More effects”, you can also replace the generated photos with different effects.

The above is how to use imgkits to turn a portrait photo into a 3D Disney cartoon photo and the steps to do so, you can get the cartoon photo you want in 5 seconds with a simple upload, this AI intelligent processing technology is really great, share it with your friends and use it together. and if you ever wonder how to start a photography business, you can check this site for further steps.

How do I change the background of my photo?

We often need to change the background of photos in our work and life, how can we do it quickly? Professional designers will use Photoshop to perform complex operations to change the background of a photo. But for most of us, if we use Photoshop like a designer, we need to spend a lot of time and effort to learn how to operate Photoshop software, which is obviously not possible.

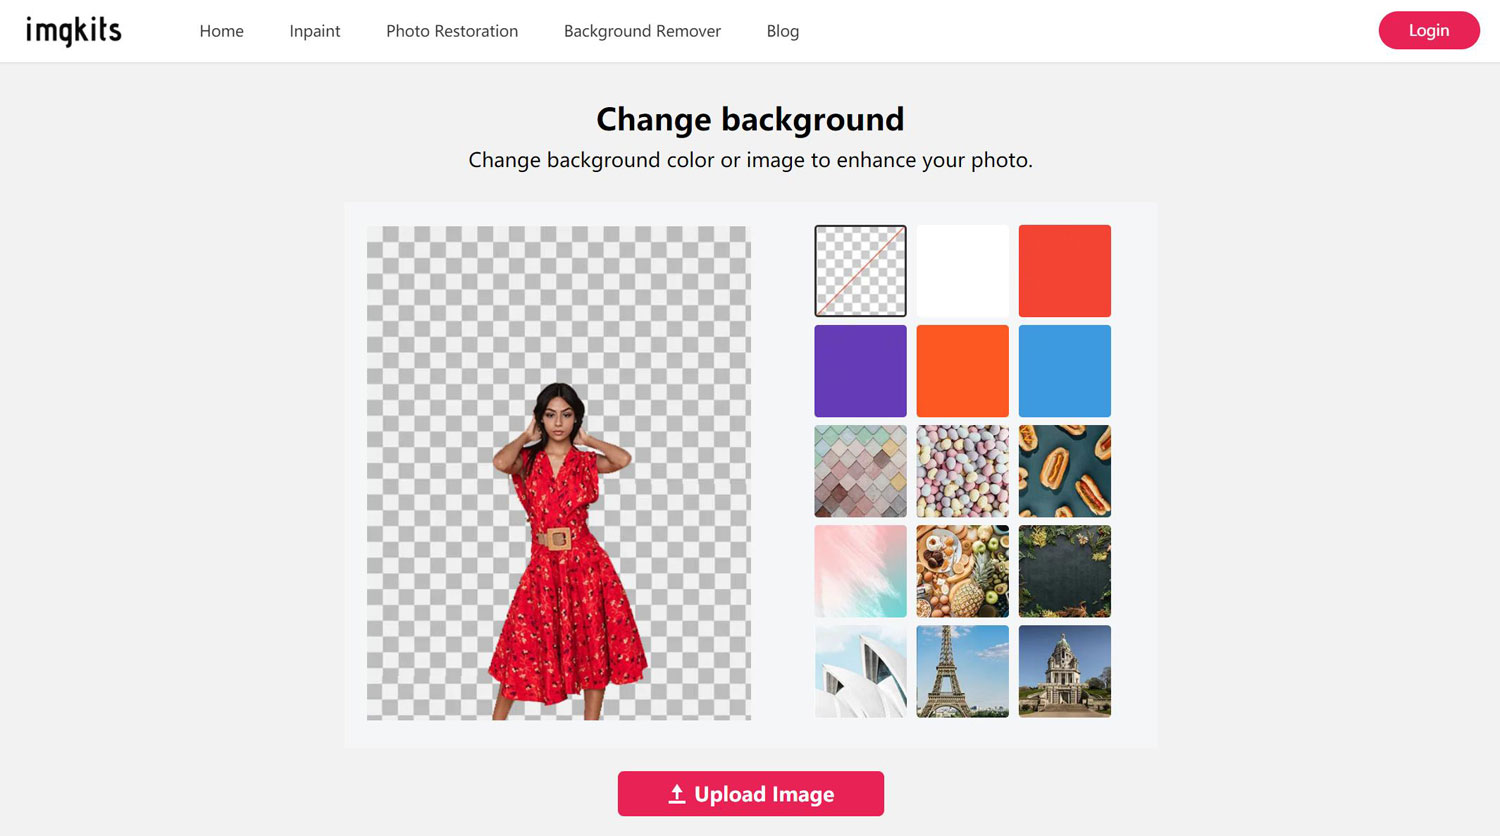
Now you can use imgkits to change the background of your photos without any professional knowledge or complicated operation skills, you can do it in a few easy steps, just take a look at the steps below.

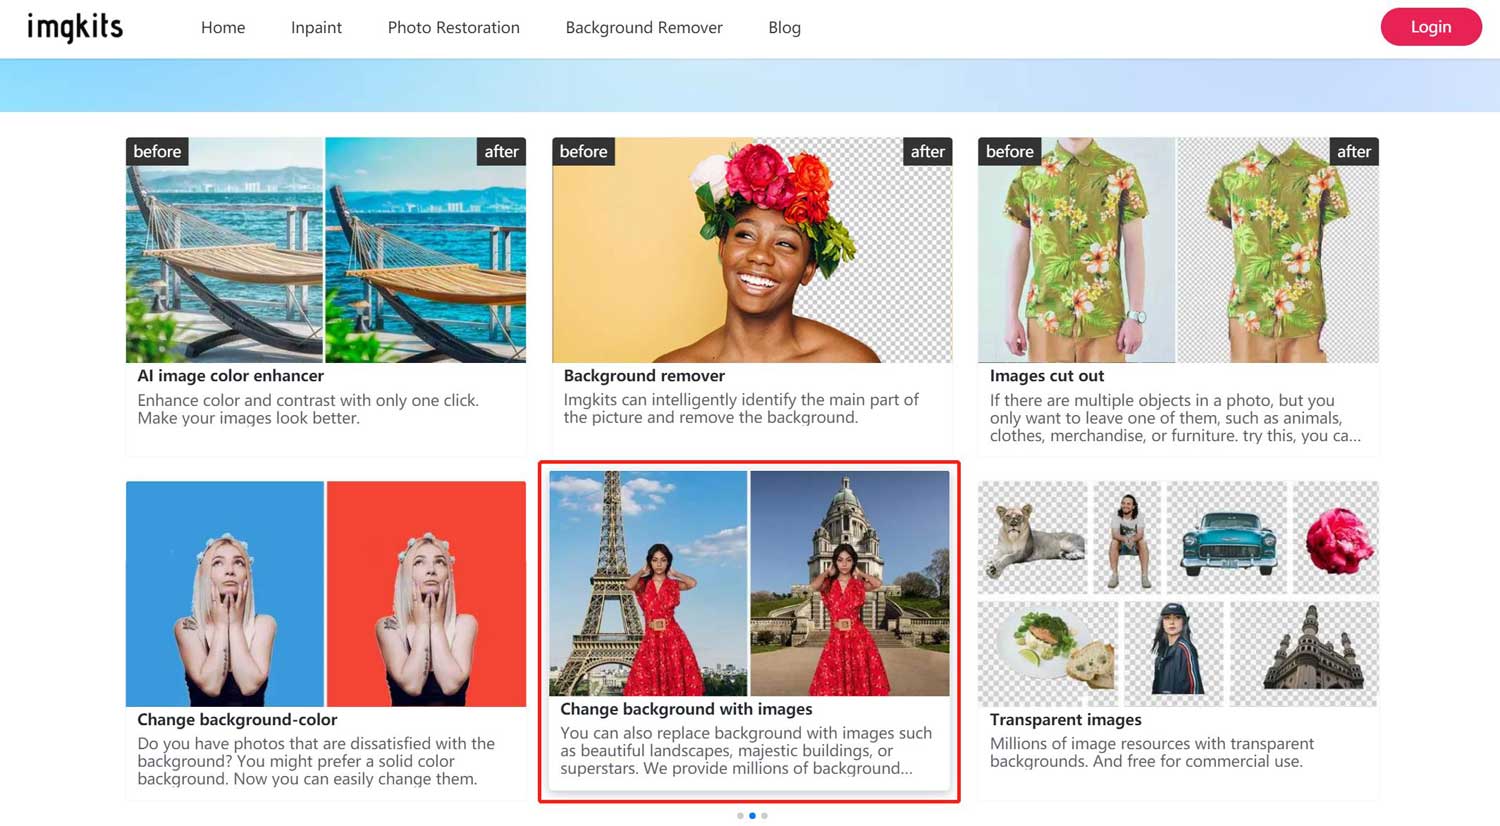
Step 1. Open imgkits, select “Change background with images” and click on it.

Step 2. Click the “Upload Image” red button and upload the photo you want to change the background

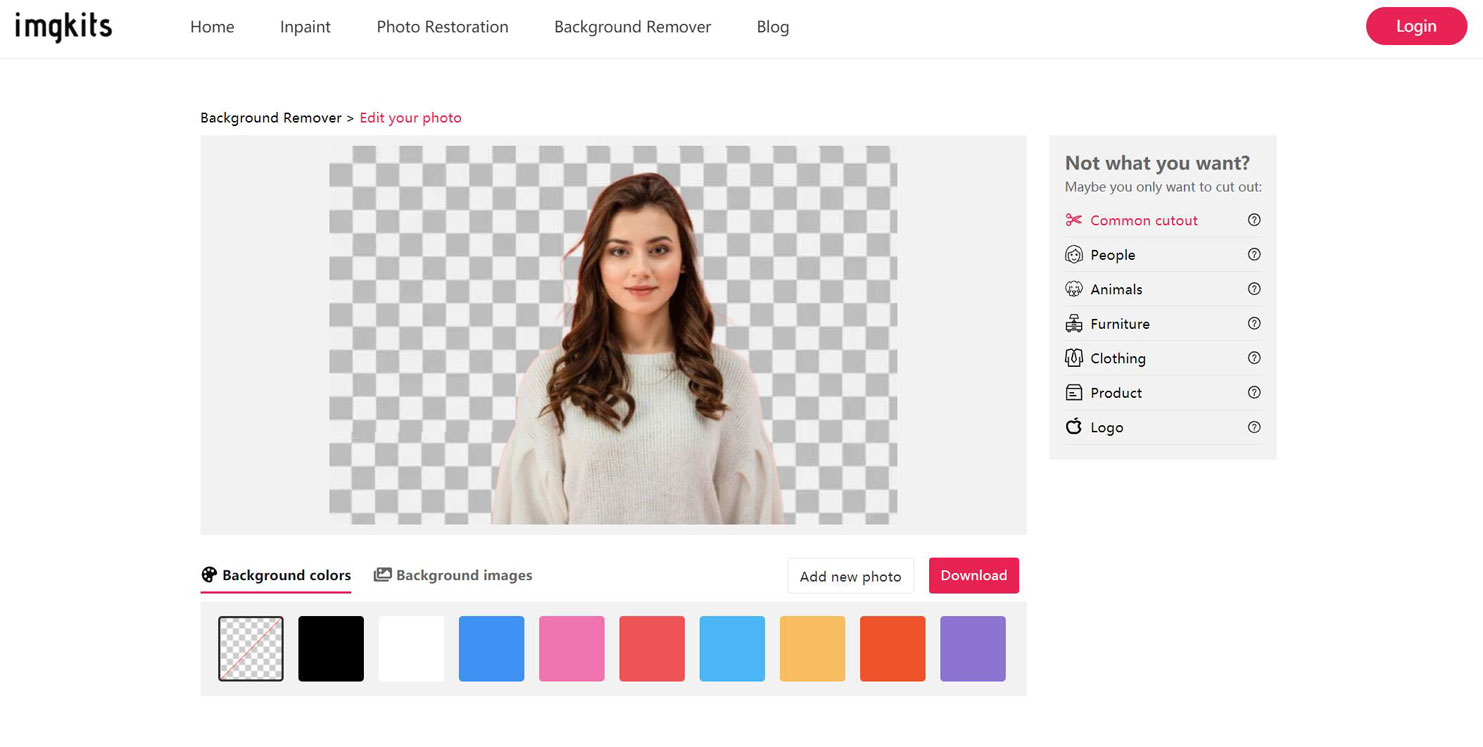
Step 3. Wait for 5 seconds, the intelligent AI will automatically identify and remove the background of the photo, you will see that the background of the photo has changed to transparent state.

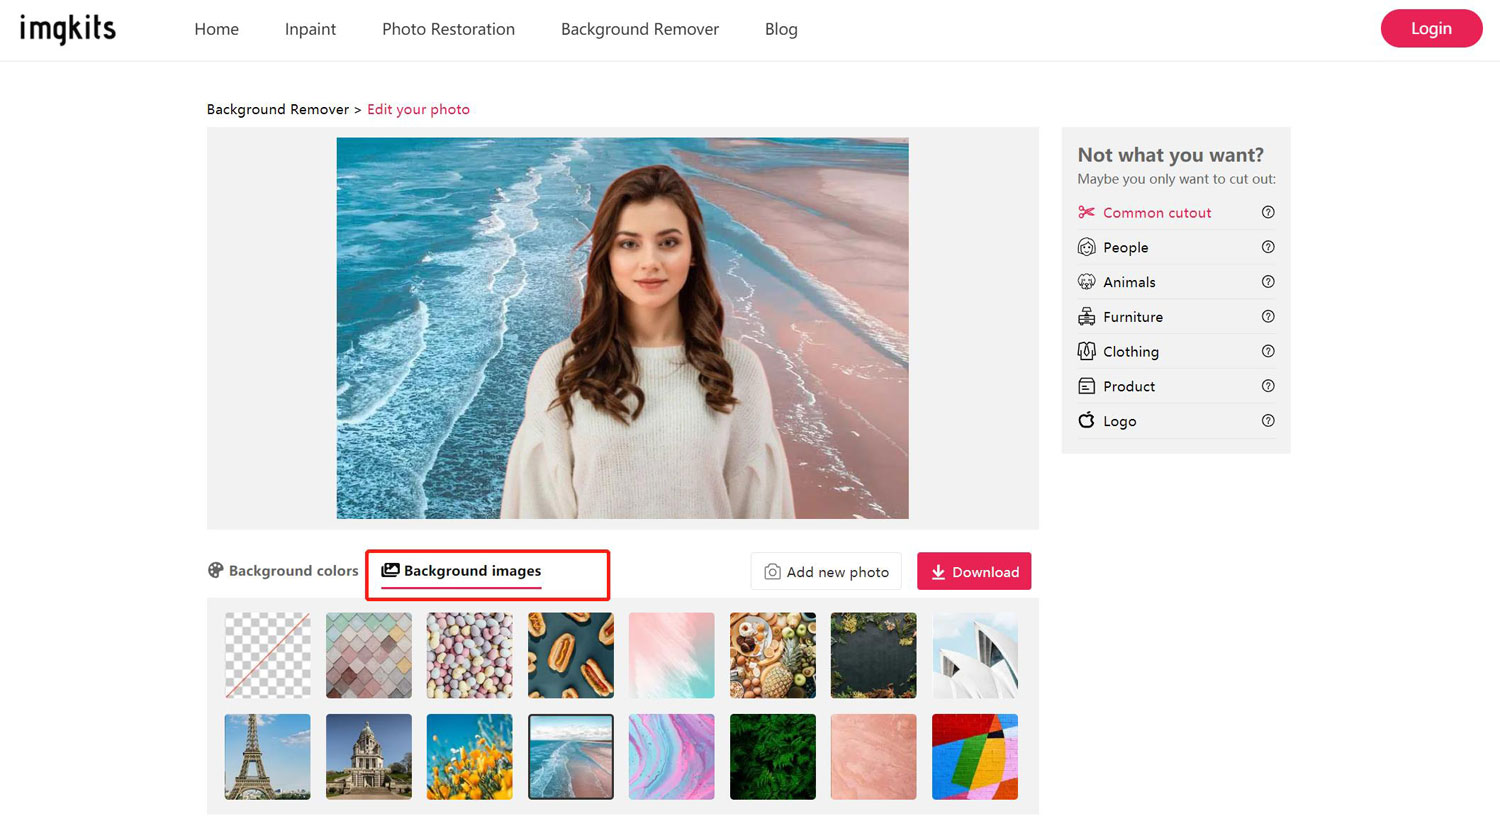
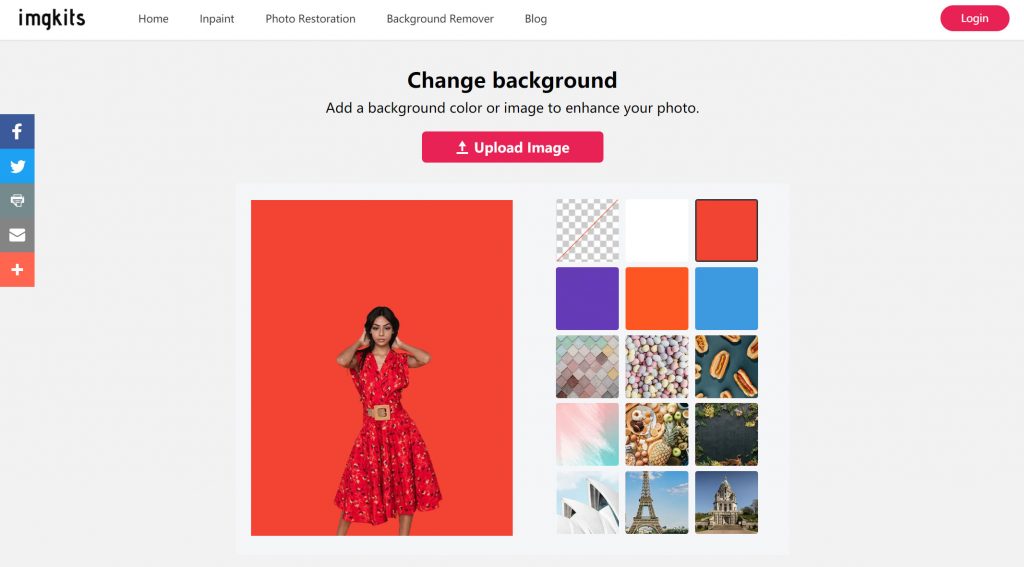
Step 4. By clicking “Background Images”, you can select one image from the gallery provided by the system and use it as a new background for the transparent background photo.

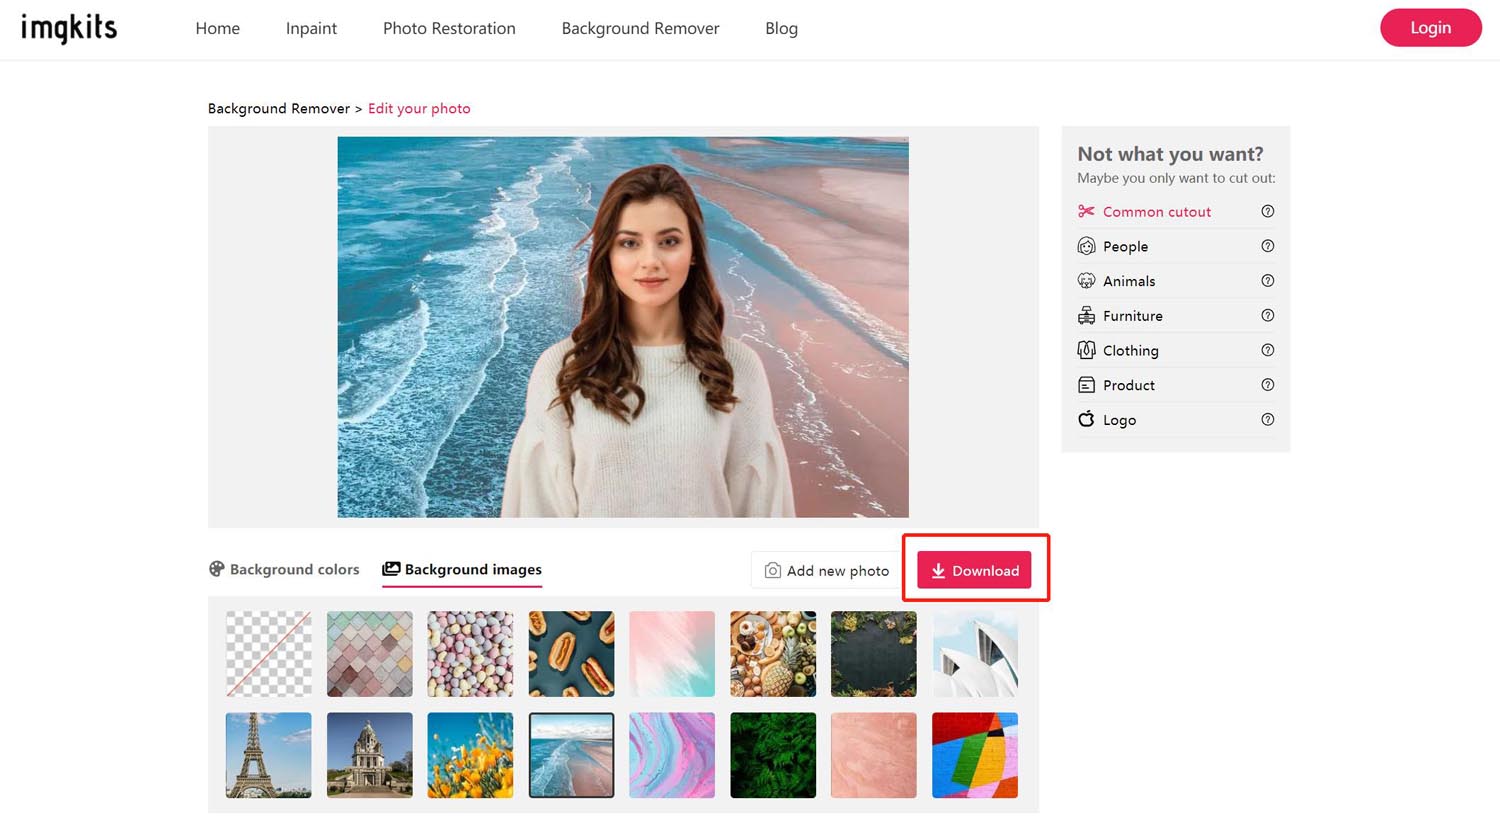
Step 5. Click the red “Download” button to save the photo with the new background for use.

Conclusion

This is how to use imgkits to quickly change the background of your photos. imgkits does not require any download and installation, as long as you open Google and enter the online site you can use it. imgkits has greatly saved my work time and brought great convenience to my work and life, I recommend you to use it.

How to Remove Photo Background Online Instantly?

In reality, we all like to use scissors to cut out people or objects to make beautiful DIY photos, but do you know how to cut out objects to make them on your computer? imgkits is one of the very powerful tools you can try.

What makes this tool so good?

The main thing is its ease of use and efficiency. This tool for removing photo backgrounds gets the job done quickly, and what perhaps would take you a lot of time and a higher learning curve to do with other software, it can handle for you in just a few seconds. imgkits was created to get the job done cleanly, so you have more time to enjoy your life. That’s the great thing about imgkits, design is no longer a chore, no longer opening 20 tabs trying to find the right Photoshop tutorial that will finally show you the simple things you’re trying to figure out.

Processing portrait photos

With imgkits for portrait photos, you can create really great effects. If you need to remove the background of a photo, you can do it easily, or you can change the background of a photo and use a solid color or your favorite photo as the background.

Process e-commerce product photos

Ecommerce product images need to change the background to increase the attractiveness of the product to the customers. imgkits are very effective. You can optimize the background needed for your products according to your own ideas and the requirements of the platform to make the products more prominent and attractive to reach the customers’ willingness to buy.

How to Remove Photo Background with imgkits

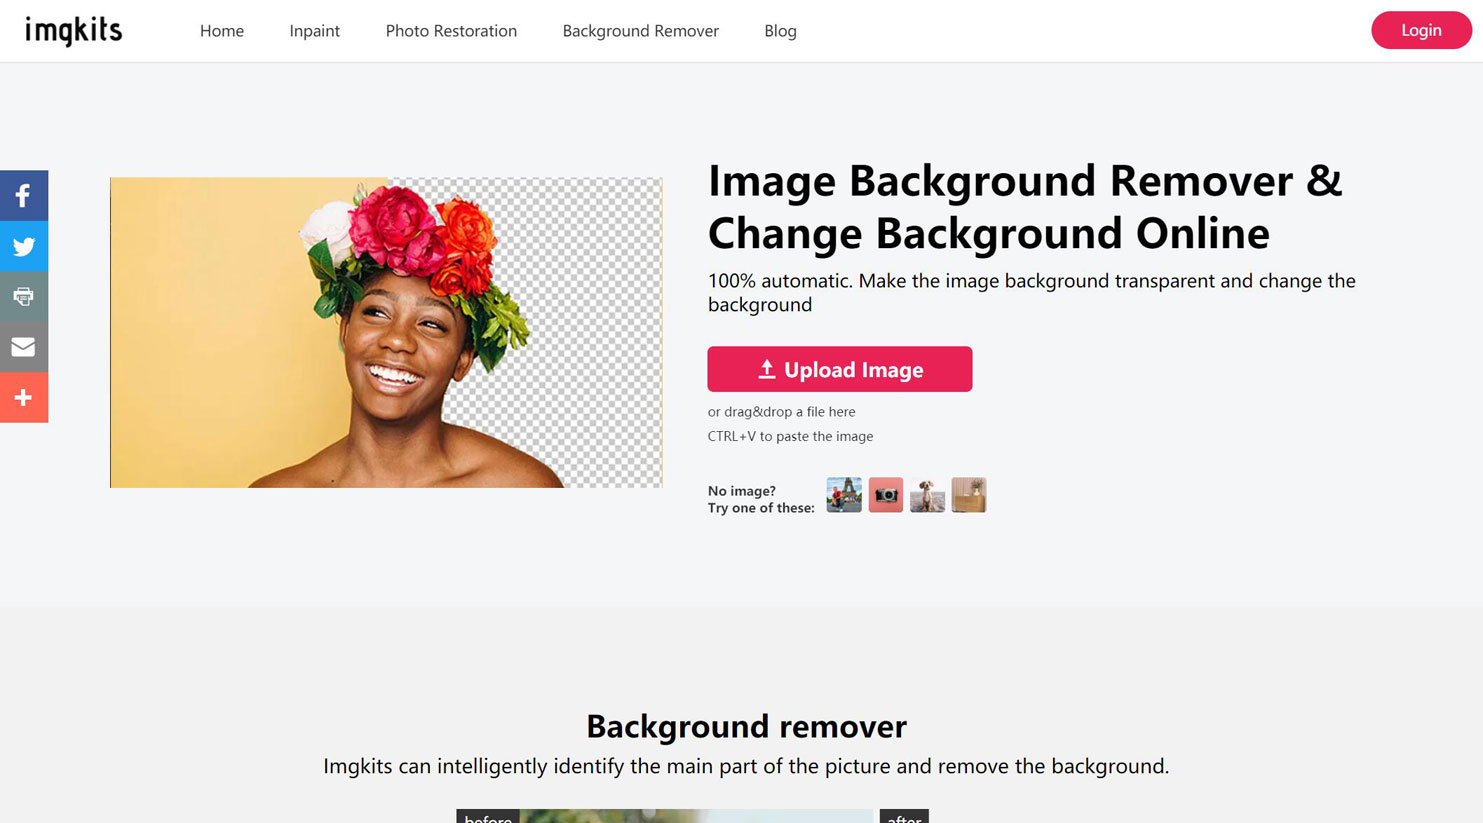
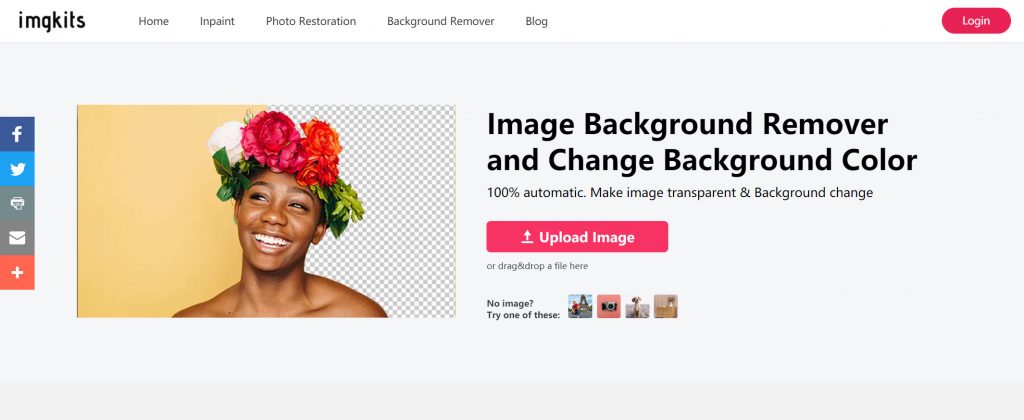
1. Open imgkits, select “Background Remover” and click on it.

2. Click “Upload Image” red button, upload the photo you want to remove or replace the background

3. Wait for 5 seconds, the intelligent AI will automatically identify and remove the background of the photo, you will see that the background of the photo has changed to transparent state.

4.Click the red “Download” button to save the transparent background image for use.

Conclusion

These are the steps to use imgkits to remove photo backgrounds quickly. imgkits doesn’t require any downloading and installation, as long as you open Google and go to the online site you can use it. imgkits has saved me a lot of time and brought a lot of convenience to my work. You can remove the background of any photo or logo to save it as a PNG transparent image so that you can promote it on your website, Twitter, Facebook or anywhere else you need to brand.

How to quickly get eCommerce product photos with white transparent background?

Today, everyone is using white transparent backgrounds for their product images. White backgrounds can make the products stand out and appear neater and more sophisticated. When buyers are browsing through product images, a white background can make buyers’ attention more focused on the product instead of being distracted by the background or other unnecessary details. E-commerce professionals believe that a clear white background can bring more sales to the product.

What makes a product picture with a white background so magical? Let’s analyze what are the advantages of pictures with white backgrounds.

1.Highlights the Product

Images are the key to online selling. Sellers must minimize visual elements in product images other than the product itself. Choosing a white background will avoid distraction and allow the buyers to focus on the product.

2.Promotes Consistency

“If you want to be taken seriously, be consistent.” Considering white background photography for the images on your product page can promote consistency. 

And consistency makes the customers feel that a brand is professional and trustworthy. Besides, product images look more organized with background removal or white background and allow the customers to browse through them easily.

3.Cost-Effective

Editing product images can be labor-intensive and expensive. It would cost you a lot to edit thousands of images for your website or eCommerce store. Although there is always an option to hire an in-house editor, it may be an impractical decision as product photos are only edited once and do not require any changes or modifications once uploaded. 

4.Optimizes and Minimizes the File Size

Another major benefit of having a white background is that it reduces the file size, making it easier to upload. Smaller file sizes can increase the website’s loading speed, apart from meeting the upload standards.

No doubt, a longer page load time can annoy the customers, and they may exit the website without making any purchase. It can also lead to decreased search ranking and consequent lost sales.

5.Makes the Product Look Clean

While you may think that customers prefer extravagance and complex product images, it is not true. In fact, potential buyers get dissuaded from purchasing when the product image is too distracting.

Using imgkits you can quickly remove the background of the product, you just need to click the button to upload a photo, imgkits will intelligently recognize the processing and erase the background of the uploaded photo to become a picture with a white transparent background, you can also do other colors to fill the background color, or fill other photos as the background to combine a new photo.

How to use photoshop to remove the background of a photo

With background removal, photo studios can place products in front of more pleasing backdrops, businesses can create leaflets from images of people and products, while hobbyists can craft greeting cards and design memes. Product optimization is a main priority in today’s online world to increase sales. However, to fabricate such exciting visuals, you must isolate the subject to put it in front of a new background. 

Using photoshop to remove the background of photos is simpler and easier for photos with solid background or more single color, but for photos with more complex edges, using photoshop will take a lot of time to process them to achieve the desired removal effect. We suggest you to use imgkits to remove photo backgrounds, its smart and fast photo background removal feature is very powerful, you just need to upload photos to get the processing results quickly, no need any professional photo processing skills, and it also supports multiple batch processing.
Methods for removing backgrounds from photos using photoshop.

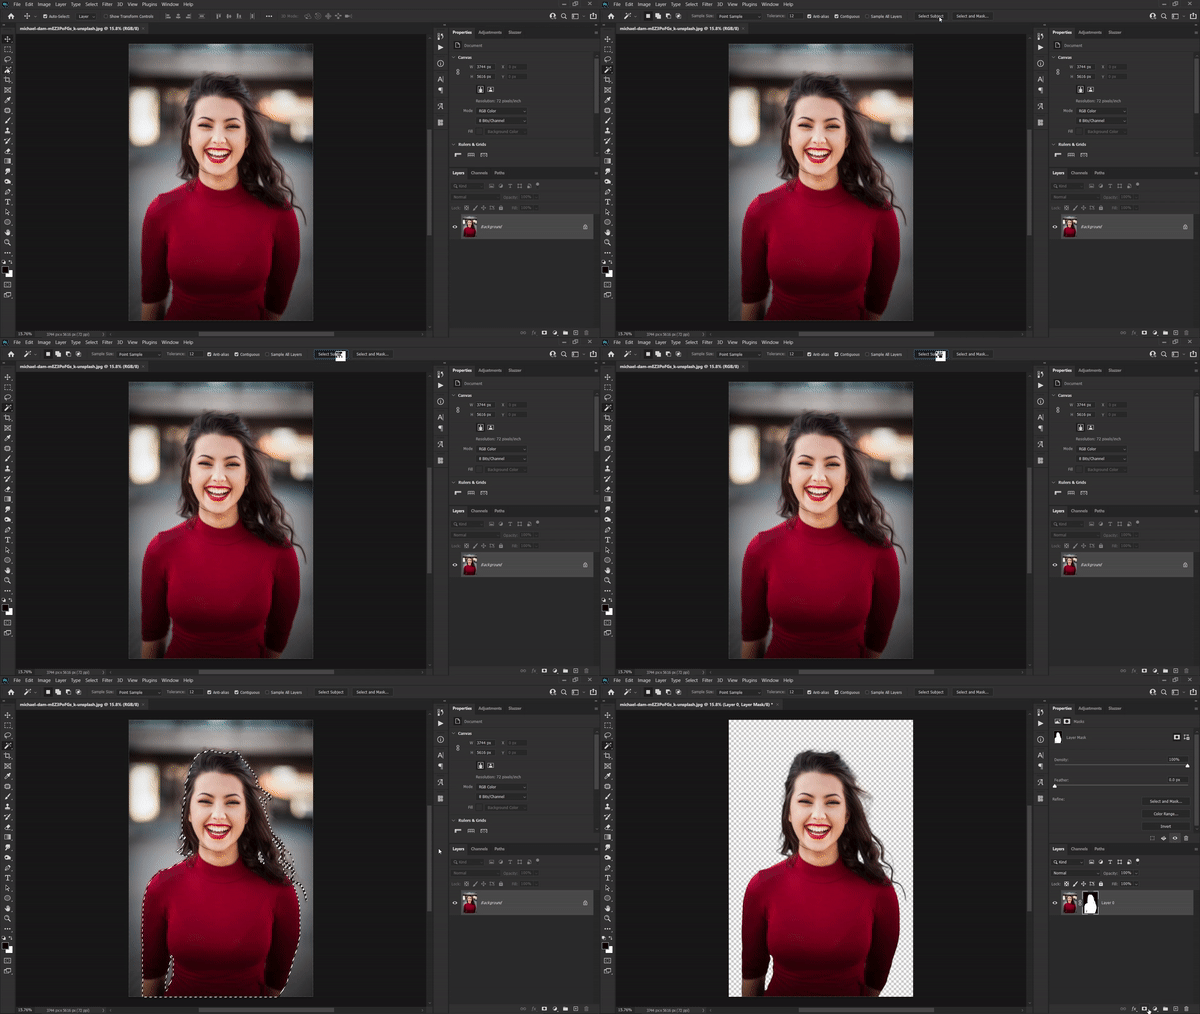
Method 1: Use the background eraser tool to remove the background of the photo

Photoshop is a savior when it comes to removing image background. The Background Eraser Tool is like a combination of the Eraser Tool and the Quick Selection Tool. This tool works by sampling the color at the center of the brush while deleting the pixels of similar color as you move the mouse. To use this tool, follow the below-mentioned steps.

Step 1.Start with opening the image

Step 2.Find the Background Eraser Tool in the Toolbox. It may be hidden in the Eraser submenu

Step 3.Ensure that the brush is the correct size. While a larger brush is quick, tight spaces may require precision; hence the smaller brush size

Step 4.To find edges, set limits on the Menu

Step 5.Now, place the center of the brush over the color you wish to remove. You will get rid of matching hues within the tolerance

Step 6.By default, the Background Eraser is set to Continuous sampling. This implies that it will erase any matching color that crosshair hit upon. In case you have numerous hues in the background, you must keep sampling and deleting them. However, if you have a single hue such as sky blue, change to Once.

Method 2: Use the Quick Select tool to remove the background of the photo

It’s hard to imagine the subject of a photo surrounded by a completely different background. Before you place the subject into a new and attractive background, you must remove the existing background of the image.  Background removal may seem like a difficult task, but it isn’t with the Quick Selection Tool. This tool is most suitable when there is a clear difference between the foreground and background.  The Quick Selection Tool is hand down, one of the best ways to remove image background. Besides, it is super easy to use.

Step 1.open the image in Photoshop

Step 2.To remove the image background, select the ‘Quick Selection Tool’ from the tools panel. In case you can’t find it, look for it nested in the Magic Wand Tool

Step 3.In the options bar, check Auto-Enhance, which should give smooth, high-quality edges to the image

Step 4.Now, click the button and move the pointer to the desired area. Quick Selection will find tones that match the Selection until it finds an edge

Step 5.You can also subtract from the Selection using the Option key or Alt key and move over to the section you wish to deselect

Step 6.To deselect an area, you can also change the tool to deselect (minus) in the menu bar

These are some of the ways and techniques to remove backgrounds from photos using Photoshop, you need to spend a lot of time to learn and use Photoshop software techniques to get the processing results you want. But with imgkits online processing there is no such problem, it uses artificial intelligence AI processing technology, you just need to upload your photos with your hands and you can quickly get the perfect background removal effect in 10 seconds.

How to quickly delete unwanted people from photos?

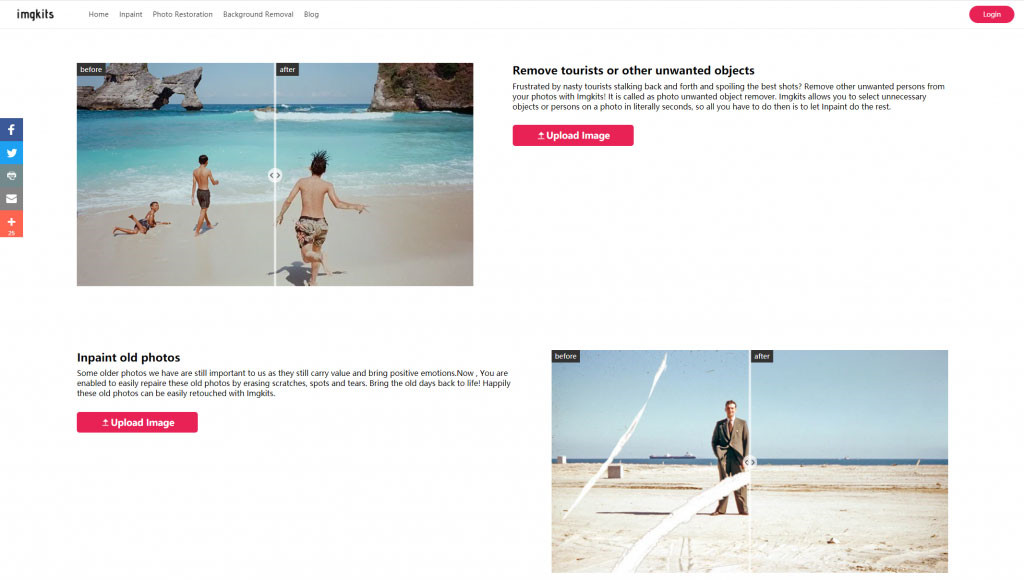
When traveling or taking photos in our daily life, we often encounter strangers intruding into the shot. Or maybe you took a picture with an ex-partner, ex-friend or someone who is no longer in your life for many reasons and now you don’t feel like it anymore. imgkits offers the “Remove tourists or other unwanted objects” feature to help you solve this problem perfectly. The “Remove tourists or other unwanted objects” function provided by imgkits can help you solve this problem perfectly, by quickly erasing the people you don’t want.

Step 1: Open into Imgkits and select ” Remove tourists or other unwanted objects “

Step 2: Click “Upload Image” and upload the photo of the person you need to erase

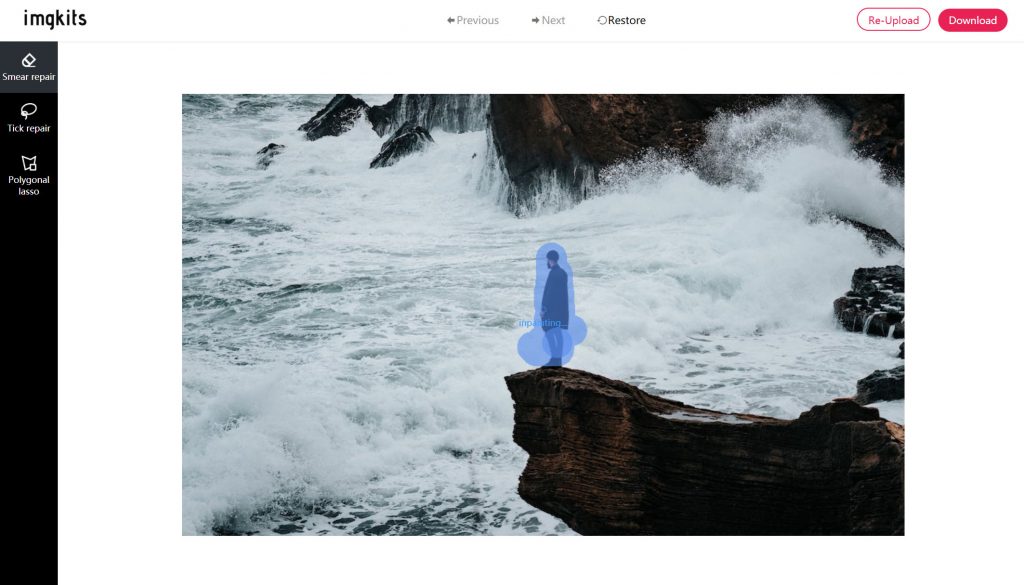
Step 3: Use the brush to mark the person to be erased, and the system will erase automatically after the erasure is completed

Brush smear marker

Click “Smear repair” on the left to adjust the brush size; click “Tick repair” on the left to switch to the lasso tool for drawing; click “Polygonal lasso” to switch to the polygonal lasso tool for drawing.

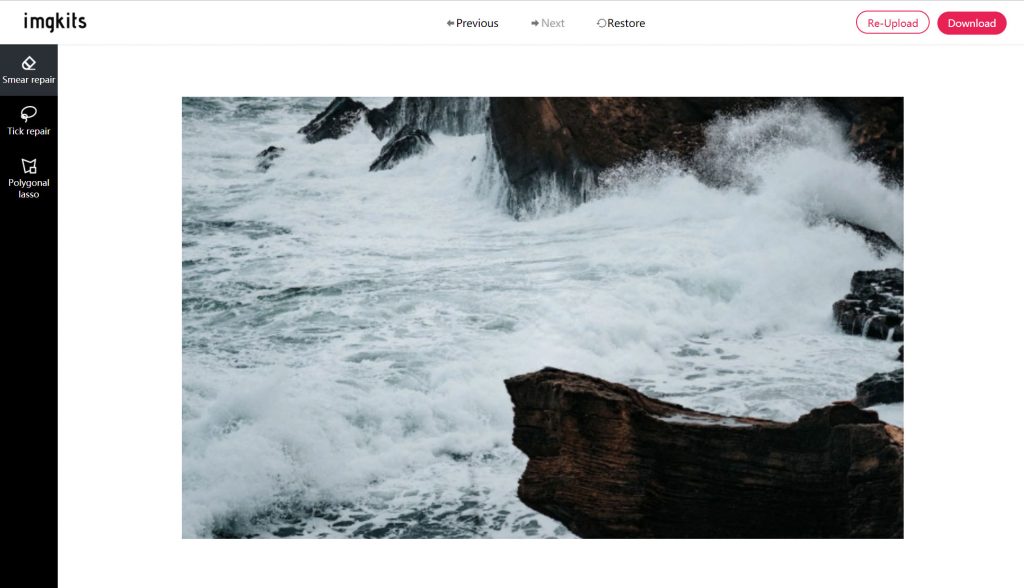
Finish removing the watermark

Click “Previous” above to undo the current operation and go back to the previous step; click “Next” to cancel the undo operation and go to the next step.

Step 4: Click “Download” in the upper right corner to download and save the watermarked photos; click “Re-Upload” to re-select the new images to upload

Effect

This is the step by step method to use imgkits to erase unwanted people from your photos, is it very easy? If your photo has more people and complex, you can paint the people area in several times, this will take more time but the final result will be better than you think, come and try it.

How to make blurry photos clear?

Whether it is a cell phone or a professional digital camera, when taking photos, the photos taken will be blurred and unclear due to the movement of the subject, improper camera grip or focusing errors. So what are the ways to make these blurred photos clear?

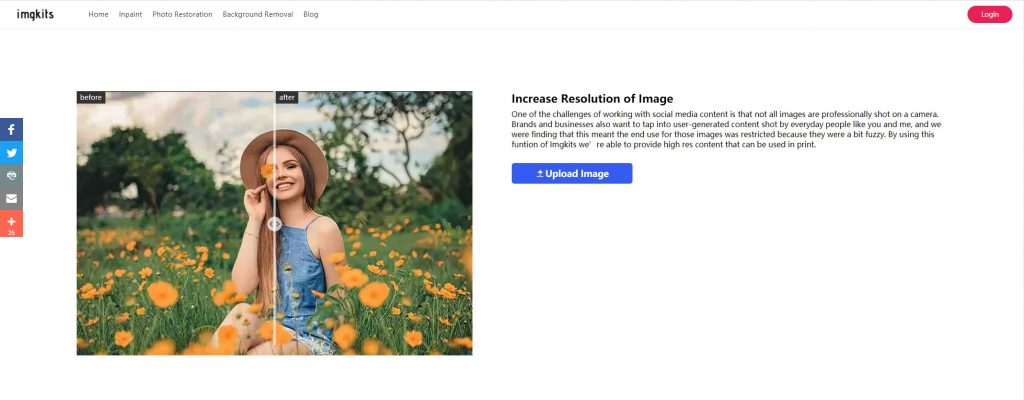
Method 1: Use imgkits’ image resolution enhancement function

Imgkits is a professional online image restoration and processing website with powerful intelligent AI image processing technology, with a variety of image restoration and processing functions, improving image resolution is one of them. What’s more is that you only need to upload a blurry photo and wait for 5 seconds to get a clear photo after processing quickly, you don’t need to have any image processing skills, it will also protect and delete all your uploaded items within 24 hours and no one can access and view them without your permission.

How to use Imgkits to enhance image resolution:

Step 1: Open into Imgkits and select “Increase Resolution of Image”

imgkits official website home page

Step 2: Click “Upload Image” and upload the photo you need to improve the resolution

Increase Resolution of Image

Step 3: Click “Download” in the upper right corner to download and save the clear image; click “Re-Upload” to re-select and upload a new image

Method 2: Use Photoshop for sharpening

Adobe Photoshop requires more skilled software operation skills, if you are a Photoshop enthusiast, then you can use it to improve the clarity of the image, if you have never touched it is not recommended, then you may need to spend a lot of time to get familiar with using it.

Step 1: Open the image in photoshop and convert it to a smart object

Step 2: Select the smart sharpening filter, adjust the sharpening and edges and other values

Step 3: Change the blending mode of the image to Brightness

Conclusion:

Through the above 2 methods we can see that Imgkits smart enhance image resolution is more simple and fast, can save us a lot of time, is a more simple and fast method.

How to quickly remove watermark marks from photos in 1 second?

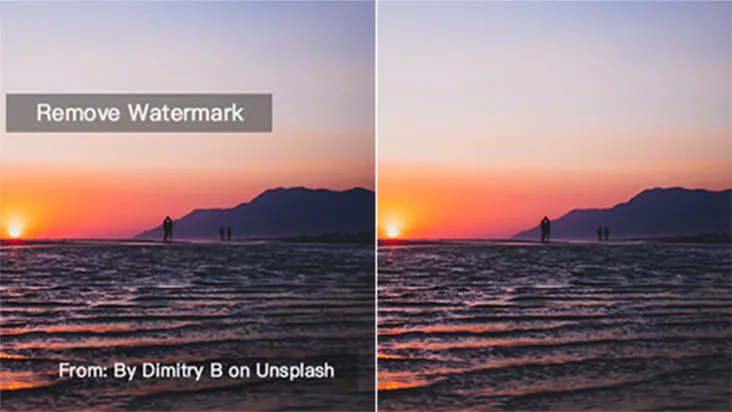
Imgkits can quickly remove all kinds of watermark marks from your photos with a simple upload and smear operation, without any professional image processing skills, so let’s learn it below.

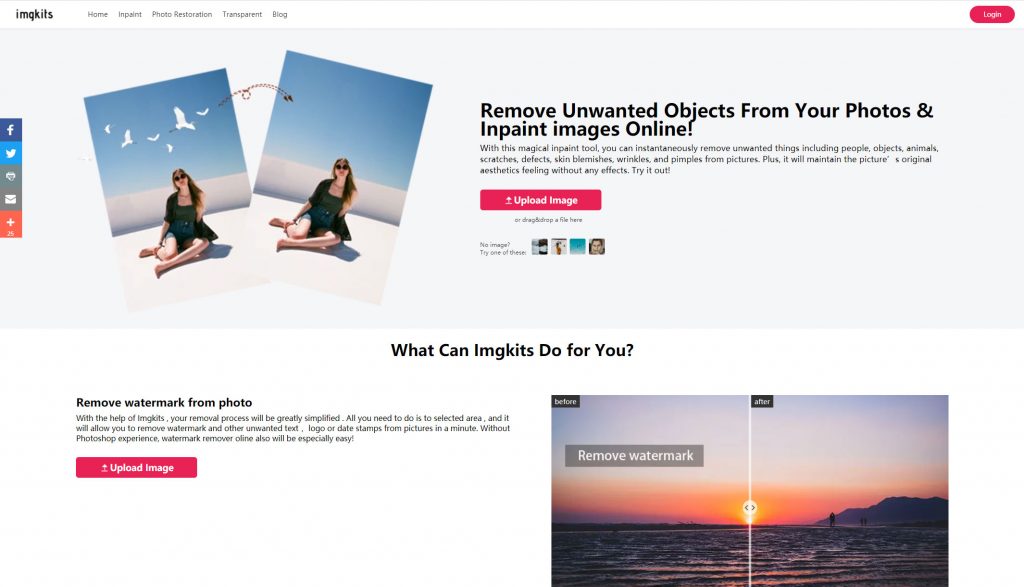
Step 1: Open into Imgkits and select “Remove watermark from photo

imgkits official website home page

Step 2: Click “Upload Image” to upload a photo with watermark

Remove watermark from photo

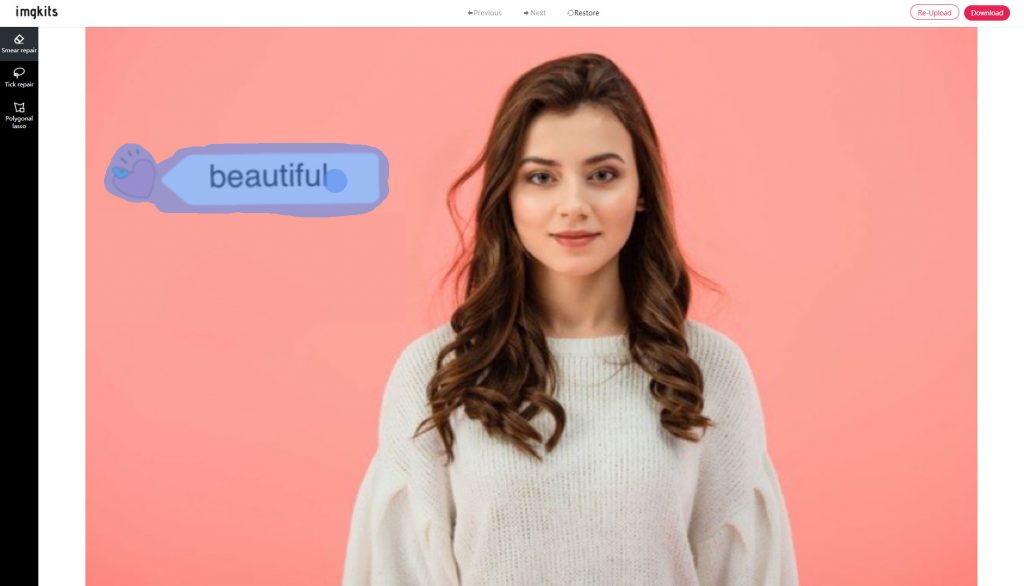
Step 3: Use the brush to scribble marks on the watermark trace area, and the system will automatically erase the marked area

Brush smear marker

Click “Smear repair” on the left to adjust the brush size; click “Tick repair” on the left to switch to the lasso tool for drawing; click “Polygonal lasso” to switch to the polygonal lasso tool for drawing.

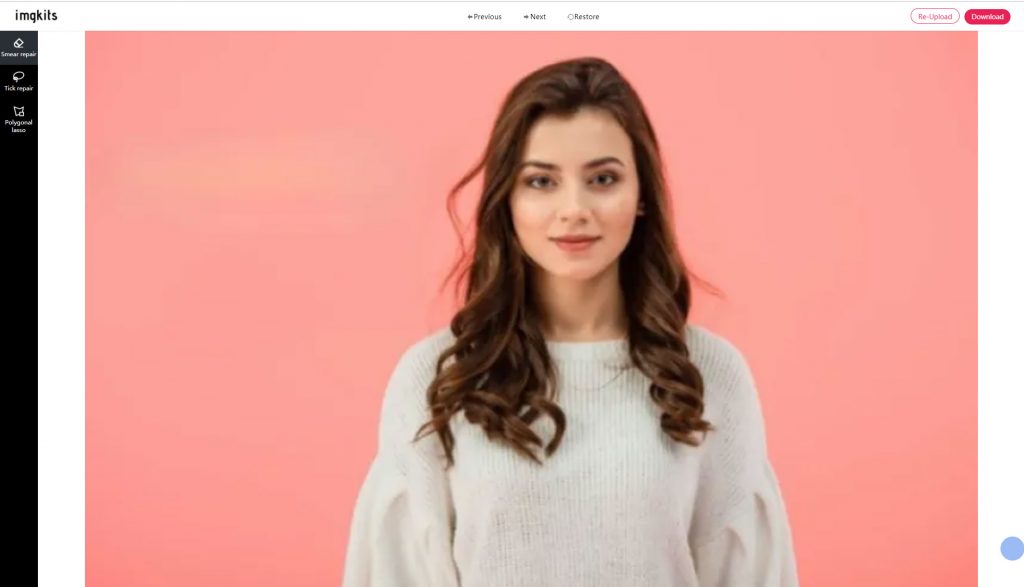
Finish removing the watermark

Click “Previous” above to undo the current operation and go back to the previous step; click “Next” to cancel the undo operation and go to the next step.

Step 4: Click “Download” in the upper right corner to download and save the watermarked photos; click “Re-Upload” to re-select the new images to upload.

Effect

The above is the step by step method to remove photo watermark using imgkits, is it very simple? If your picture watermark is more complicated, you can paint the watermark area in several times, so that although it takes more time, but the final effect will be better than you can imagine, come and try it.